 by
The ground erupted in a colossal explosion, then fell back as black rain upon the soldiers who had not been killed outright. They were still struggling to recover their senses when motorcycles burst from the smoke, engines roaring. Hovering a metre above the ground, they hurtled straight towards the infantry. Gunfire came from every direction. Shaken by these sudden attacks, the men were on the verge of breaking ranks.
Then a tank unit that had just taken position on a nearby hill opened up on the attackers. Unable to damage the armour of these steel monsters, they were soon forced to retreat. The soldiers cheered, but as they waved their thanks to their allies, a noise tore through the sky.
A squadron of enemy fighters swooped down on the tanks, half of which were riddled with heavy armour-piercing rounds. The silhouette of a mobile fortress emerged through the mist. Flashes of light appeared, followed by the thunder of cannon fire and explosions that wiped out what remained of the armoured unit on the hill.
Already, the engines of the enemy motorcycles heralded their return…
Of guns and men
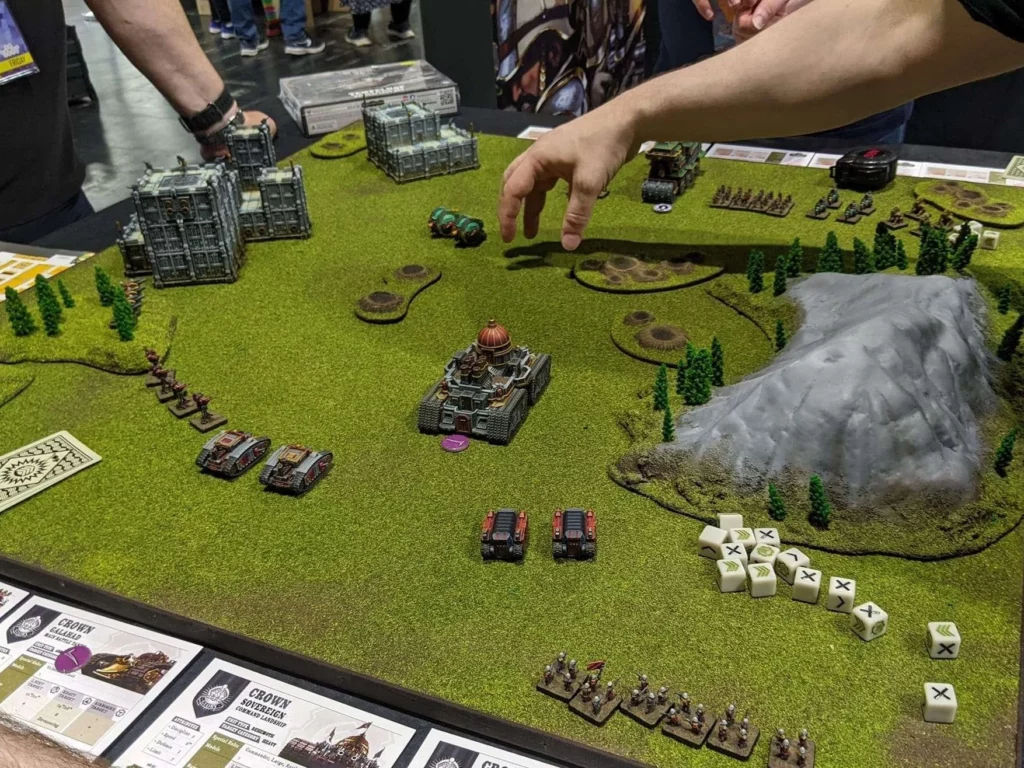
Armoured Clash is an epic-scale game. In games at this scale, rank-and-file soldiers generally stand between 6 and 10 mm tall and are grouped together on bases. To earn a base all to itself, a model needs to be a war machine—usually literally, though sometimes figuratively as well.
In Armoured Clash, a man stands 10 mm tall. If that means nothing to you, it is roughly the size of a Risk playing piece. This scale is becoming increasingly common in epic games, sitting between the 15 mm used by many historical games—Mortem Et Gloriam, Flames of War and Team Yankee, to name just a few—and the 6 mm so beloved by some enthusiasts of ancient or Napoleonic warfare. Admittedly, this scale renders close-order formations particularly well.
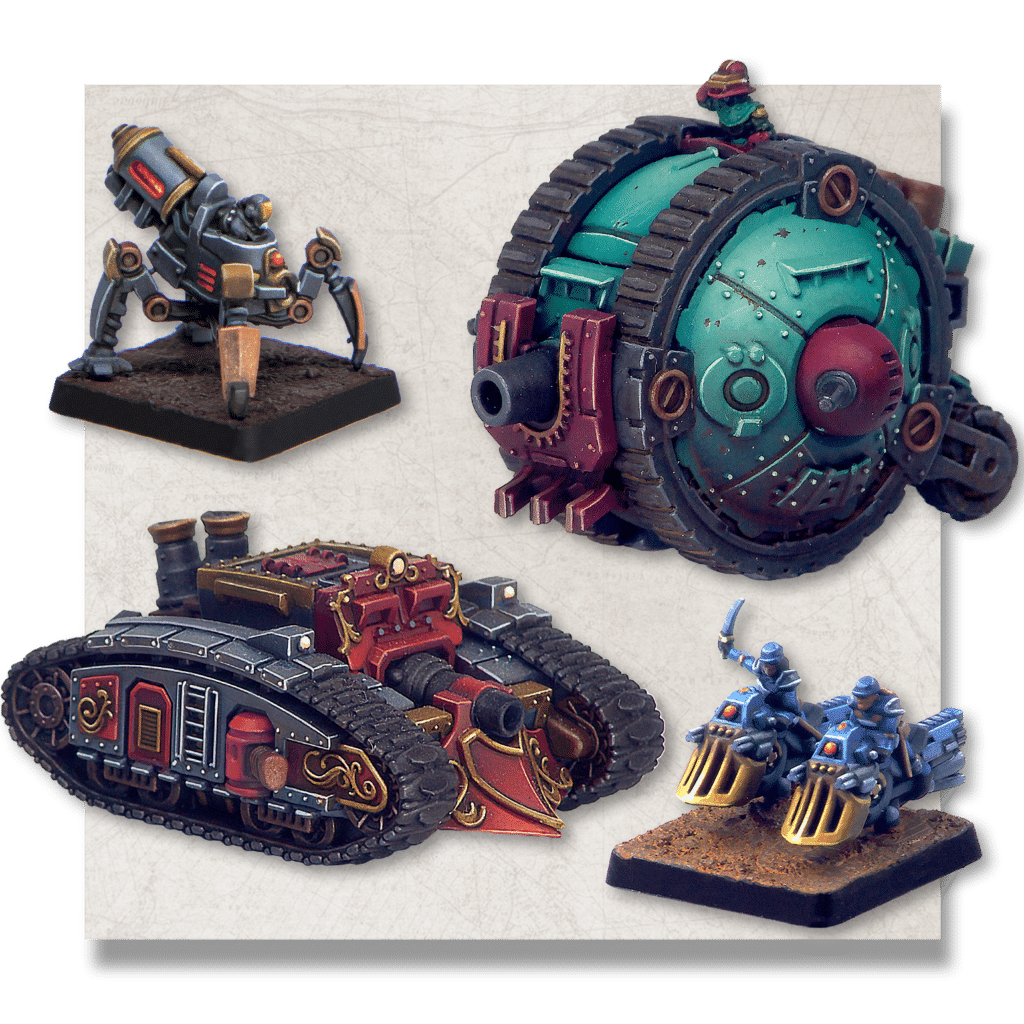
True to the steampunk genre, the vehicles in Armoured Clash are large enormous. Tanks and guns that would stand more than a storey high at full scale are not uncommon. And the largest are genuine walking buildings bristling with guns. The setting depicts an alternate nineteenth century and, quite logically, nearly all infantry moves in ranks. The game therefore blends ranked units (a “rank-and-file game”, where you must manoeuvre rectangles of soldiers) with less rigid but still compact formations, mainly heavy vehicles.
Simple, straightforward rules
What you need to play
Before discussing the rules, I must say that the rulebook is one of the clearest and easiest to use that I have ever read. Like its Dystopian Wars counterpart, every two-page spread provides references to concepts related to the rules being explained. There are also plenty of examples. The layout is very well designed and leaves ample room for illustrations.
As in the other Dystopian Age games, you need a deck of cards and a few dice… all specially designed for the game. And they are not the same as those used in Dystopian Wars. You can actually make do with perfectly normal six-sided dice, although they are less convenient. The cards, however, are essential. The good news is that you receive everything as soon as you buy a large box of troops or a two-player set.
Movement
Despite the rigid appearance of infantry formations, there are no complicated movement rules of the kind sometimes found in other games. Your units can move through one another and travel freely in any direction. They need only remain within their maximum movement distance and return to a legal formation at the end of their move. For most light troops, that means reforming into a neat little block.
A few units must use a turning template—like the ships in Dystopian Wars—but these are usually limited to the largest vehicles. A keyword on their profile will tell you when this applies. And this game has no shortage of keywords.
Activations and scenarios
Like almost every recent game, Armoured Clash uses alternating activations. One player activates one of their units, moving and then attacking with it, in that order only. The other player then does the same. This lets you respond immediately to your opponent’s latest move. The game also includes a reaction-fire mechanic (Opportunity Fire) that allows you to shoot at an enemy unit before or after it moves, but before it attacks.
A game is won through Victory Points. Each scenario explains how to earn them. The rulebook contains five fairly varied scenarios. Sometimes you must hold fixed points on the table; sometimes you must retrieve them. Objectives may be worth more points in the final round, or certain objectives may be more valuable than others… Every scenario genuinely feels different. It is worth noting that heavy units—tanks and the like—normally cannot control objectives. As in Dystopian Wars, destroying an enemy unit also earns you a few points, as do the cards in your hand; more on those later.
Armoured Clash is not a game where you can simply destroy the enemy’s troops and ignore the scenario. Eliminating enemy units—and using your cards—can, however, make all the difference in a close game!
The core system
The Sturginium-powered engine driving almost every action in the game is built around a simple reroll system. You roll a few dice, then check which of them you can reroll. Rest assured, you need fewer than in Dystopian Wars. There is no need for a wheelbarrow full of dice here… although the miniatures are another matter… Anyway, you then compare the result with the target’s resistance. I will explain the mechanic in detail because it is quite unusual.
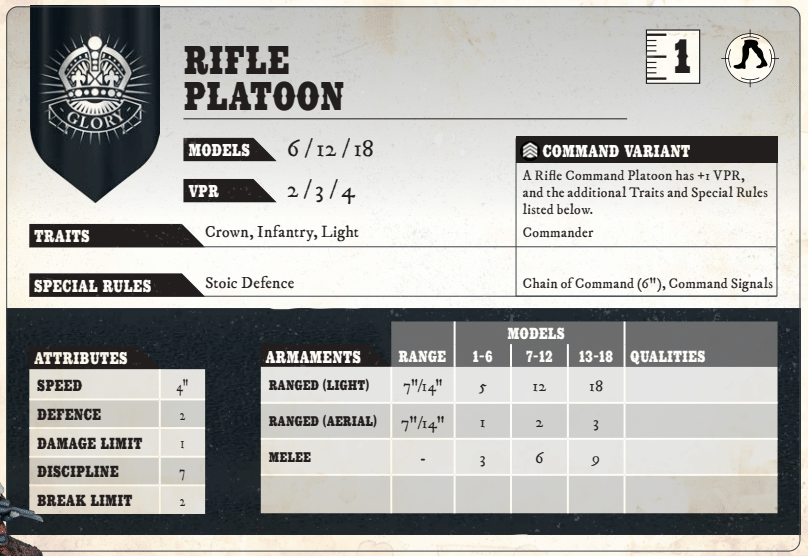
Let us take the most common case: one unit fires at another. Take the attacking unit’s card and find the weapon row corresponding to the target type—aerial, light or heavy. If no such row exists, you cannot fire at that type of unit. Then check the column matching the number of elements remaining in the unit—the number of vehicles or bases. This gives you the number of dice to roll. A unit’s power therefore decreases as it suffers losses.
A list of criteria determines whether the attack is Improved, Weakened or neutral. These are the test conditions. Surprisingly, there are not many of them: six for a shooting attack and five for close combat. This reinforces the game’s epic scale. The player is a general commanding hundreds of men from afar, so every attack needs to be resolved quickly.
For the unit in our example, a partially concealed target imposes a penalty, while firing at close range grants a bonus. One bonus cancels one penalty, and vice versa. If at least one bonus remains, the attack is favourable (Improved), but if more penalties remain, it is unfavourable (Weakened). The game calls this the Combat Rating.
Rolling the dice
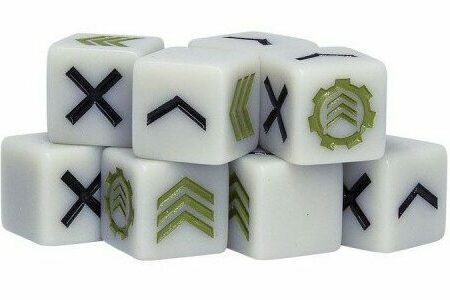
Time to roll the dice! The green faces are successes called Strikes.
A result showing chevrons (3 x ︿ ) inside a cog is a Heroic Strike and corresponds to a 6. Not only does it score two Hits, it also adds another die that you roll immediately. Ouch! The regular chevrons faces are Strikes; they correspond to a 4 or 5 and score one Hit.
Black symbols are failures, but they can be rerolled depending on the attack’s bonuses and penalties.
The single chevron (︿) face is a Glancing Strike and corresponds to a 3. It is rerolled unless the attack is Weakened, meaning it has more penalties than bonuses. The X face is a Miss and corresponds to a 2. This one can only be rolled again when the attack is Improved, meaning it has more bonuses than penalties.
The empty face is a Blank and is equivalent to a 1. It is always a failure and cannot be rerolled without a special ability.
Depending on the Combat Rating, you may therefore reroll certain dice—or not. This simple mechanic rewards or punishes strategy far more subtly than a straightforward bonus to the roll. On each die, a Weakened roll has a 50% chance of scoring at least one Hit, a neutral roll has roughly a 58% chance, and an Improved roll has a 66.67% chance—exactly like a +1 bonus. More importantly, being able to pick up certain dice and roll them again because of a sound tactical choice feels rewarding.
You can make only one reroll per attack. Special abilities may let you reroll more dice, but never allow a second reroll. No additional dice can be added at this stage either: a Heroic Strike scores two Hits but does not grant an extra die. All that remains is to count the Hits scored.
What matters is the numbers…
Count the number of Hits and compare it with the target unit’s statistics. The defender therefore has nothing to do—there is no dice roll to protect the unit, as everything is defined by its profile.
The first characteristic to check on the target is its armour rating (Defence). This is the number of Hits required to inflict one point of damage (Damage). You can think of it as armour or protection. With a Defence of 3, suffering 10 Hits inflicts 3 Damage: 3 × 3 = 9, and the final Hit is not enough to inflict another point of Damage.
Once you have determined the amount of Damage, compare it with the damage threshold (Damage Limit). This indicates how much Damage is required to remove one base or vehicle from the unit. It therefore works like the Hit Points of each element in that unit. Unlike Hits, excess Damage remains in play and is recorded with tokens. If the target has a Damage Limit of 2, for example, our earlier attack removes one base and the remaining point of Damage is marked with a token. When the unit has a number of Damage tokens equal to its Damage Limit, it loses another element and removes the tokens.
Troop morale
If the target suffers at least one casualty from the attack, it makes a Suppression test. If it fails, it enters… you saw this coming, didn’t you?… a state of suppression (Suppressed). It then suffers a penalty to its actions. If it was already Suppressed, it Falls Back. And if it falls back too close to an opponent, it loses troops. Beware of encirclement! Like the other morale tests in the Dystopian Age games, this test uses a numerical value on the cards.
You will have noticed that only the attacker uses dice. At most, the defender merely draws a card for the Suppression test. I am sure this was a deliberate choice by the game’s designers. Removing the “and now I roll X saving dice” step from every attack makes the game much faster. But the defender’s almost total passivity will not appeal to everyone. You truly endure attacks without any possible recourse. Well, almost—special abilities can still be triggered.
The cards
I will keep this section brief because it works almost exactly as it does in Dystopian Wars. The only difference in these rules occurs when opposing cards have the same value. If you want more details, I encourage you to read the corresponding section in the article below. Those who already know how it works can wait for us in the next section.
Cards have two sections: Command, which grants a special rule for that activation, and Conquest, which earns Victory Points. Each player holds several cards from their deck during the round. If the conditions described on a card are met, it can be played. When a player uses the Command section, they place the card face down. Their opponent may then choose one of the cards in their hand to counter the effect (Interfere). If the countering card has a higher value, the effect is cancelled. The use of a card’s Conquest section cannot be countered.
The factions
Armoured Clash features every nation from the Dystopian Age. The game is more recent than Dystopian Wars, and its various factions still have a fairly distinctive playstyle. An army list is divided into Battlegroups and must include the faction’s core Battlegroup. Each Battlegroup has a Commander Bonus—either permanent or activated. I have also listed the core Battlegroup’s bonus for each faction, since that Battlegroup is mandatory.
The Crown
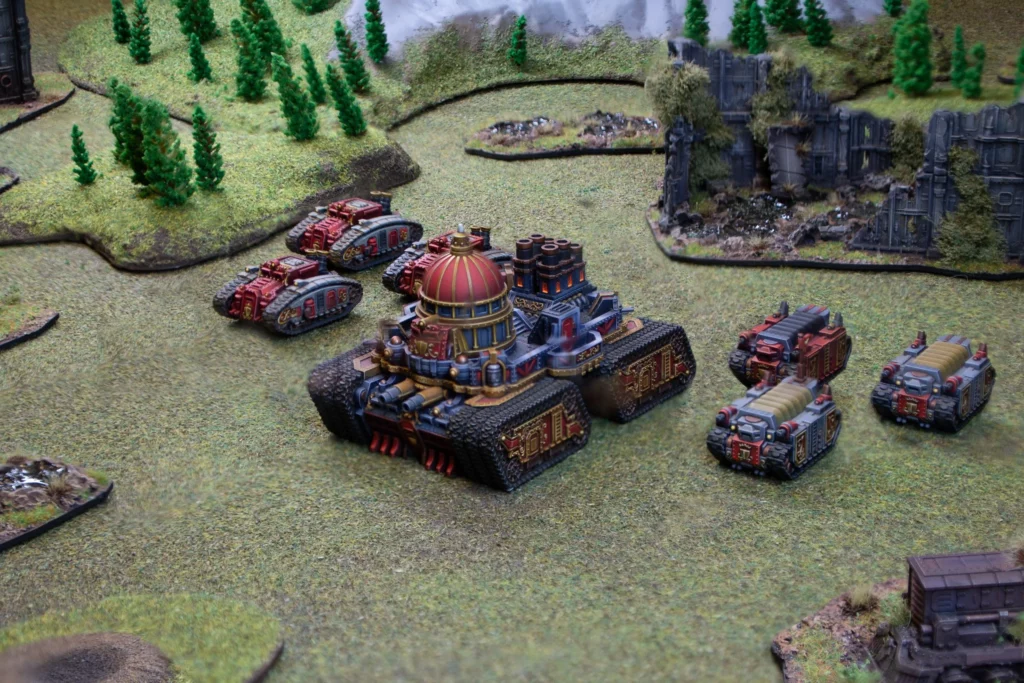
Crown troops dominate at long range. They have the best artillery in the game, and many units outrange their counterparts. Their troops have good morale and are effective, but their infantry is not especially resilient. They have few fast units or units that excel in close combat. Above all, they offer their opponent very few surprises. A Crown general will try to weaken the enemy at long range before finishing them off with specialised troops such as cavalry.
Commander Bonus: Instead of drawing a random card for morale, the Crown player may choose to use a card from their hand. Combined with the troops’ good morale, this makes Crown units very difficult to force back when they refuse to budge.
I should also mention the special ability of an Auxiliary Battlegroup: when activated, Crown armoured units count towards controlling objectives at the end of the round. This may make the Crown the only faction that can rely on tanks to secure scenario objectives.
The Latin Alliance
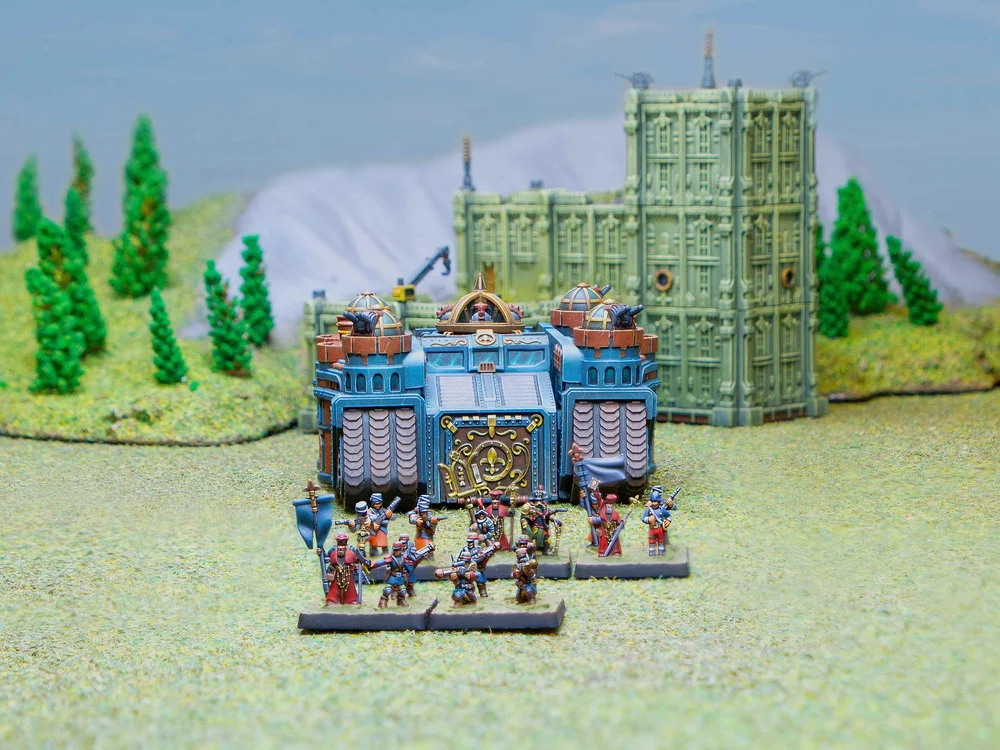
The Alliance has a large number of inexpensive but individually ineffective units alongside a few elite ones. It also has many ways to mitigate—or even benefit from—a failed morale test. The Alliance may often fall back, but it rarely flees. It is one of three factions capable of deploying reserve troops anywhere on the table, although only its elite troops can do so.
The Alliance’s elite troops are its Legionnaires. When they are not deployed in drop pods, they usually arrive in armoured transports from which embarked units can fire—an extremely rare ability.
Commander Bonus: When certain units fail a morale test during their activation—after a failed assault, for example—another nearby unit can be activated immediately. The opponent therefore has no opportunity to activate a unit between these two activations.
This mechanic is called “Coordination” and is also used by every faction’s transports. In Armoured Clash, activating a transport allows you to activate the unit it carries immediately afterwards.
The Sultanate
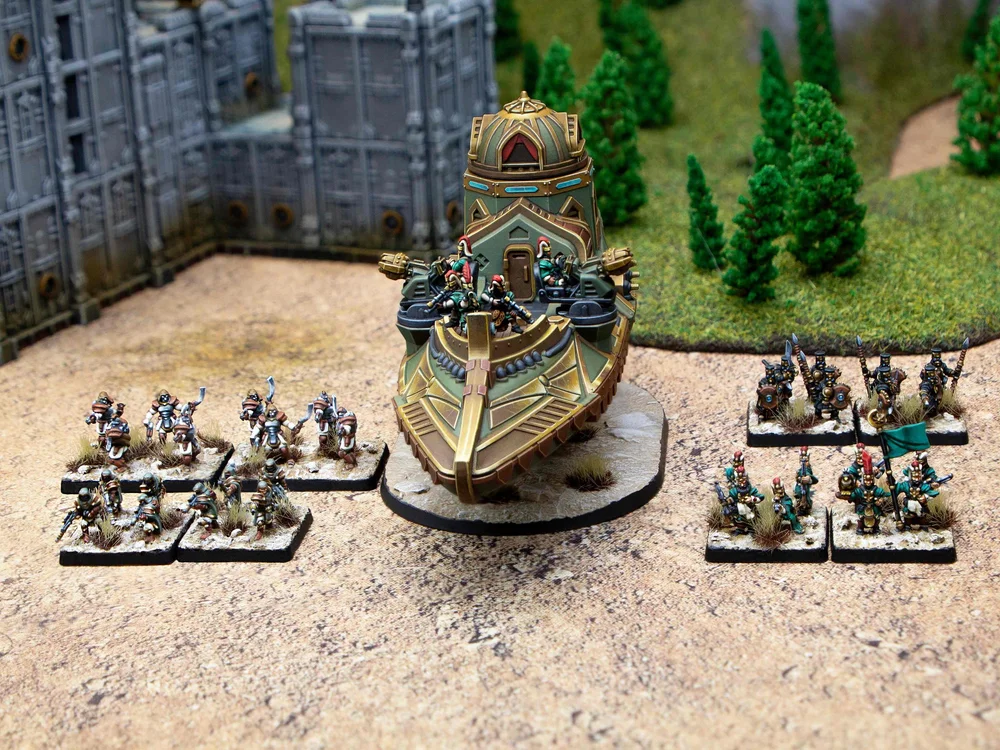
Masters of Portals, the Sultanate is an elite army that is highly mobile but not particularly resilient. Its forces can place Portals on the table each round. Infantry and cavalry can use them to arrive from Reserve, withdraw or travel from one Portal to another. This opens up unexpected angles, which is just as well because Sultanate troops do not survive prolonged exchanges of fire. Most of their units are fairly fragile, while their tougher elite units are few in number.
Commander Bonus: Discarding a card from their hand allows the general to retain a Portal used during the activation. Normally, a used Portal is removed from play at the end of the unit’s activation. This ability keeps it in place, so there is no need to wait until the start of the next round to deploy it again.
The Commonwealth
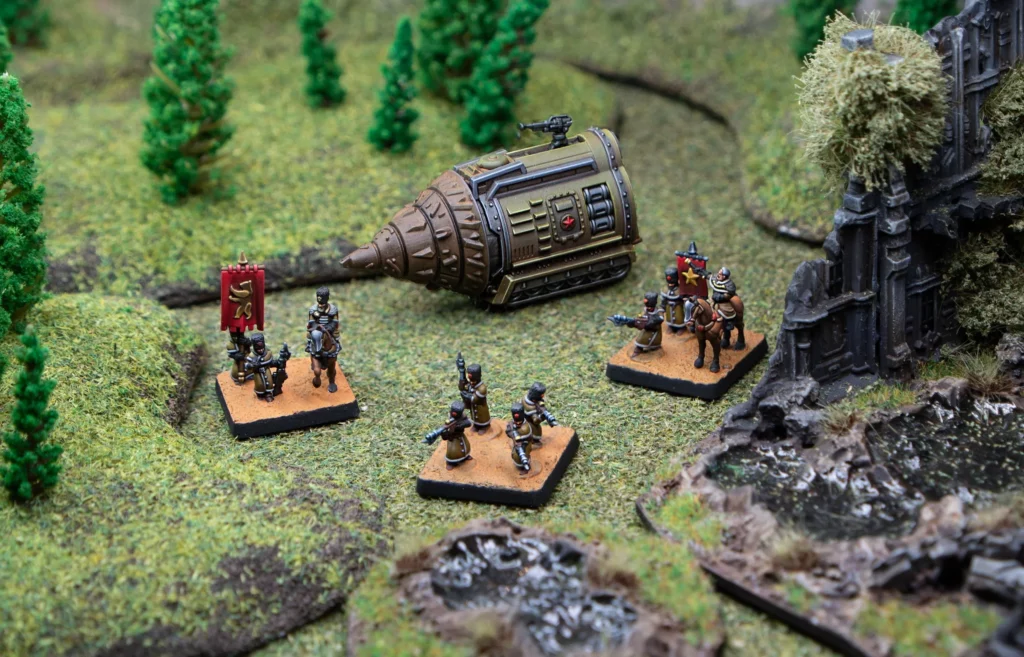
This is the third faction capable of deploying its Reserves in the middle of the table, but it does so in yet another way. The Commonwealth uses gigantic drills to excavate tunnels. The general receives one token per drilling unit and places them in their deployment zone. Each round, these tokens can be moved, potentially leaving enemy units they pass beneath Suppressed and even causing buildings to collapse! Commonwealth units are most effective at close range and in close combat.
Commander Bonus: When activated at the end of a close combat, the attack counts as a draw regardless of the number of casualties. This means that the attacker is pushed back and no morale test is made.
The Union
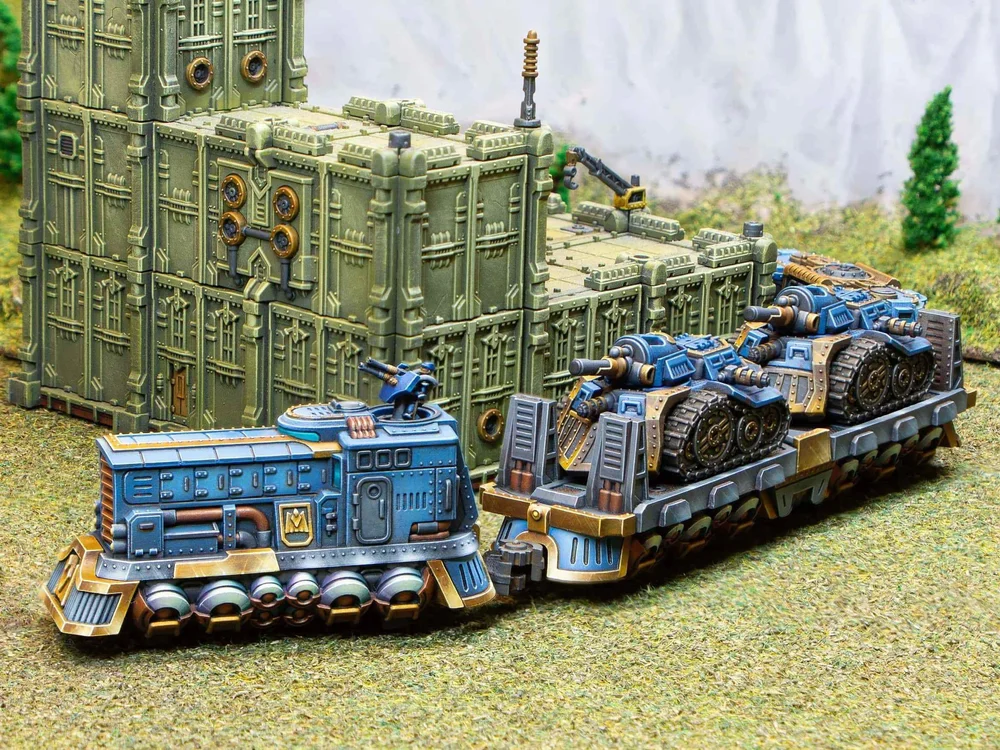
The Union’s main units can be linked to support units known as Fireteams. These units can be activated one after another without giving the opponent time to respond. The Union also fields plenty of cavalry that is effective at close range. It is a mobile, aggressive faction. It has access to armoured trains whose carriages can separate during the game.
Commander Bonus: When activated for an attack, regular Strikes count twice. The unit then becomes Suppressed.
The Empire
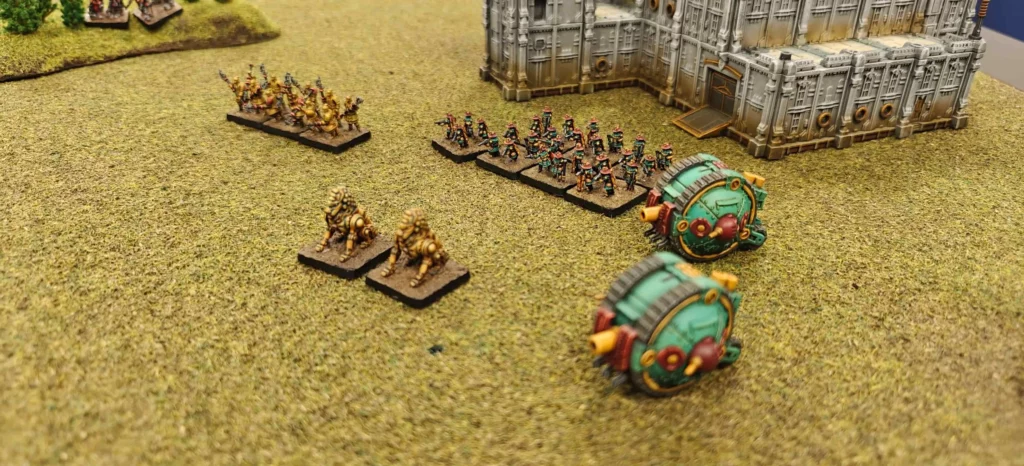
This Asian faction has numerous but highly specialised infantry. The Empire has so many troops that it has not bothered with transports. This probably makes it the slowest faction in the game, advancing like a steamroller. To compensate, it fields more units than any other faction that will only flee once they have been almost wiped out—or that simply never flee at all, like its automatons. Moreover, its core infantry units carry shields that improve their protection against fire from the front. The Empire also has a few effective long-range units. Its main weakness is its armoured units, which are fairly fragile.
Commander Bonus: The general may discard a card to ignore one Empire unit when checking lines of fire. This rule makes it extremely effective to screen troops with other units.
The Imperium
The Imperium fields an elite army. Its troops are expensive and somewhat slow, but resilient. This faction has good transports, rewarding a mechanised-infantry approach. Always outnumbered, the Imperium relies on the quality and endurance of its troops. It lacks some long-range firepower but becomes dangerous at close range. Many units carry electrical weapons, which add two dice for every Heroic Strike instead of one.
Commander Bonus: +1 Discipline during morale tests for every other Imperium unit within 3 inches, excluding embarked or Suppressed units. This mechanic encourages the general to keep their troops in small groups to improve their morale.
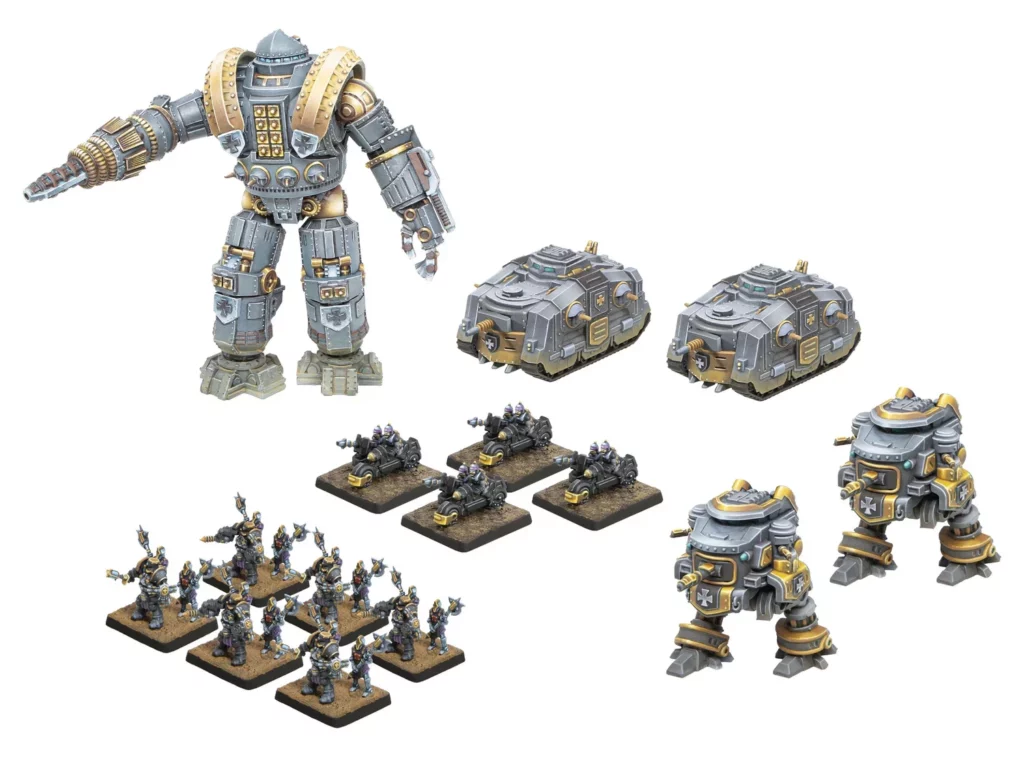
The Enlightened
Probably the most science-fiction-oriented faction, with technology that can sometimes run out of control. The Enlightened have plenty of cannon fodder and tremendously powerful experimental weapons. But that power can turn against them when the safety protocols are disabled… especially since their units are not particularly resilient. This is the high-risk, high-reward faction, with some very appealing options thanks to its combat walkers and unusual weapons.
Their units have poor morale, but thanks to a unique mechanic, troops near an “overseeing” unit—with the Peer Review quality—automatically pass almost every morale test.
Commander Bonus: When activated, the unit under supervision that has just completed its activation Recovers one point of Damage. This is one of the game’s few healing effects. Note that it does not restore vehicles or bases that have already been destroyed. Even Enlightened technology has its limits on the battlefield.
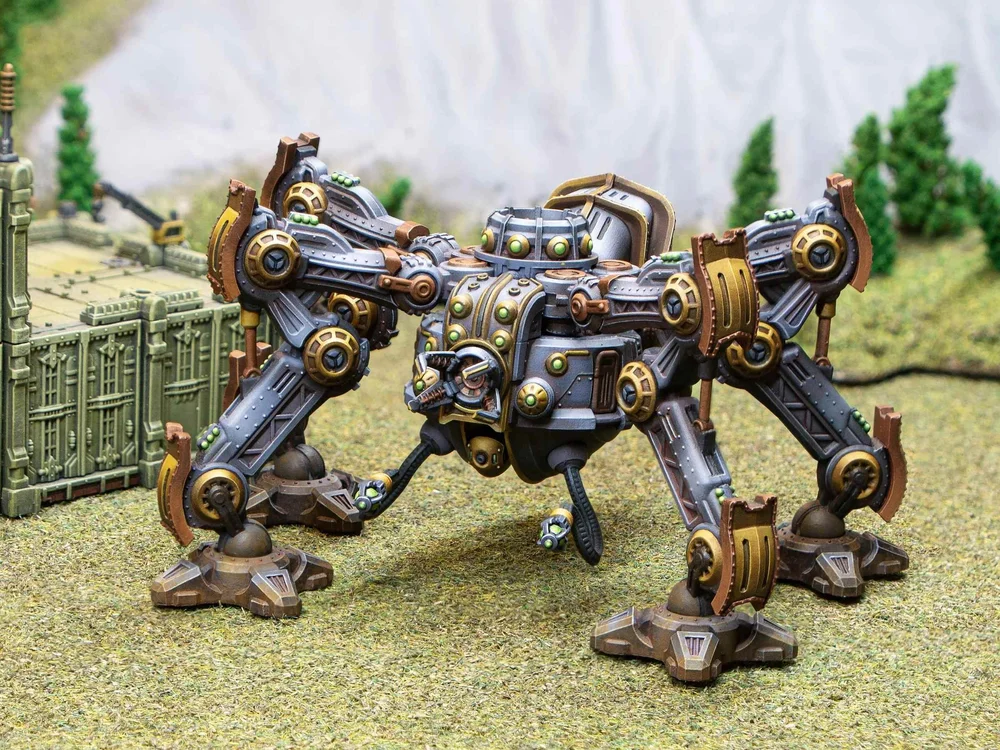
Source: Warcradle Blog
Why play Armoured Clash?
I will not revisit the game’s epic scale, its rules or the reroll mechanic. Let us talk about army lists instead.
Building your army list
Armoured Clash regulates the creation of an army list—or Force—fairly strictly. You cannot simply take several copies of an extremely powerful unit and make your opponent reconsider their choice of hobby. A list consists of one or more Battlegroups, one of which must be the Faction Battlegroup. As mentioned in the previous section, it represents the faction’s typical philosophy.
Each Battlegroup requires a certain number of units of particular types. For example, it may require one command unit and two infantry units, or one command unit, one infantry unit and one cavalry unit. The Battlegroup also determines the maximum number of units of each type you may include, as well as identifying its core units (Mainstay). This last category is very important because these are the only units you may take twice in that Battlegroup. In other words, units that are not among a Battlegroup’s Mainstay choices may appear in it only once.
Once you have met the Faction Battlegroup’s minimum troop requirements, you may begin another Battlegroup. This can be one of the available Auxiliary Battlegroups, which have different restrictions, special rules and Mainstay units.
It is time to say a word about Force Scale. There are three scales: Skirmish, the smallest; Battle, the middle size; and Cataclysm, the largest. Each scale indicates the maximum Reinforcement Level a unit can have—Basic, Reinforced or Full-Strength. This is simply the unit’s starting number of elements and ensures balance with the opposing force. Each Battlegroup, however, lets you Bolster certain units one step above the game’s normal level; such units are Bolstered. The exception is Cataclysm scale, where units can already begin at maximum strength.
Combined arms
Through its Force-building rules, Armoured Clash enforces troop diversity. This makes combined arms all the more important. Your opponent may choose to forgo aerial units in a Skirmish, for example, but this is less likely in a Battle simply because very few units can be taken twice within the same Battlegroup. You must therefore ensure that you can engage all three target types: light, heavy and aerial.
Conversely, you will want to use troops that can efficiently destroy a particular target type while limiting their exposure to enemies that are effective against them. Few units in the game are truly resilient, an effect compounded by exploding, rerollable attack dice being rolled against a fixed Defence value. The result is a kind of rock-paper-scissors dynamic between different units that cannot all attack one another, depending on their troop profiles.
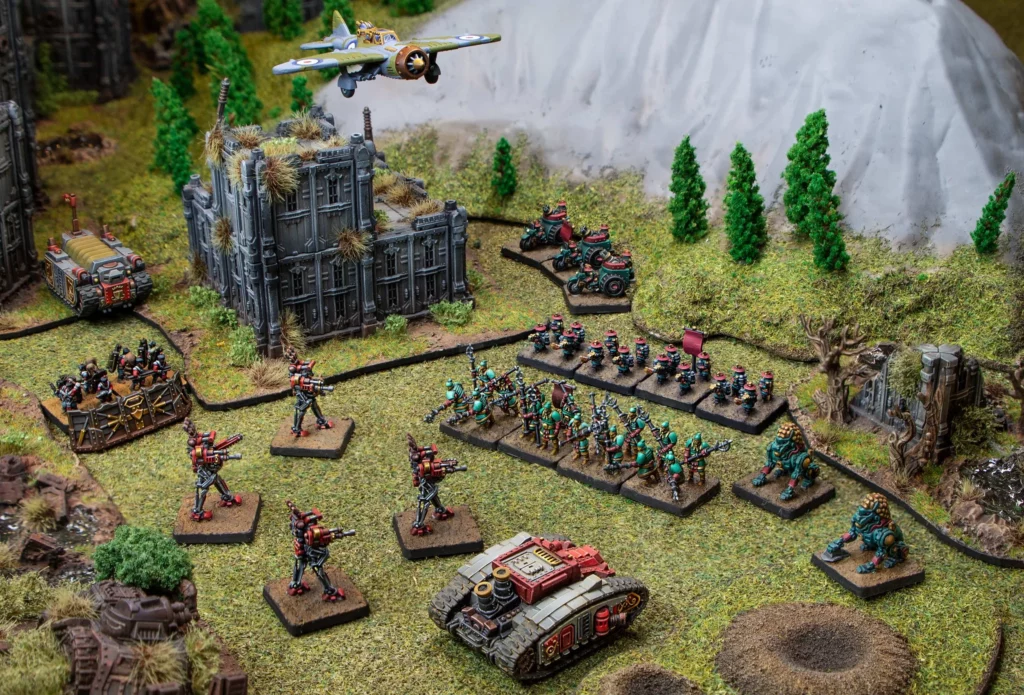
Source: Warcradle Blog
The setting
The Dystopian Age setting is detailed, coherent and highly immersive. There are no true heroes, nor any irredeemable villains for that matter; every faction has its dark side. This world comes in shades of grey, and determining which is the darkest is no easy task.
Unfortunately, there are no official rules for combining Armoured Clash and Dystopian Wars games. Given the mechanical differences between them, doing so seems complicated. If you have the opportunity to run a campaign combining both games, however, it will be an experience that few others can offer!
This probably is not for you if…
If you enjoy resolution systems with a great deal of granularity and nuance, Armoured Clash will probably disappoint you. The complexity comes primarily from the large number of keywords assigned to units, not from the rules themselves. Indeed, this abundance of special rules may be off-putting. Some units need three lines to list them all, and those lines contain only the names you must then look up in a separate rules glossary.
You absolutely hate losing units. Obviously, troops are lost in every wargame, but most troops in Armoured Clash are fairly fragile. More importantly, the defender can do nothing to save their troops beyond putting them in the best possible position. Almost everything depends on the attacker’s dice roll.
How do you get started?
There is a two-player introductory set containing a Crown force and an Empire force. It includes everything both players need to start playing. If these factions interest you, it is probably the best option. The box contains a booklet that gradually introduces the rules through a short campaign of several scenarios.
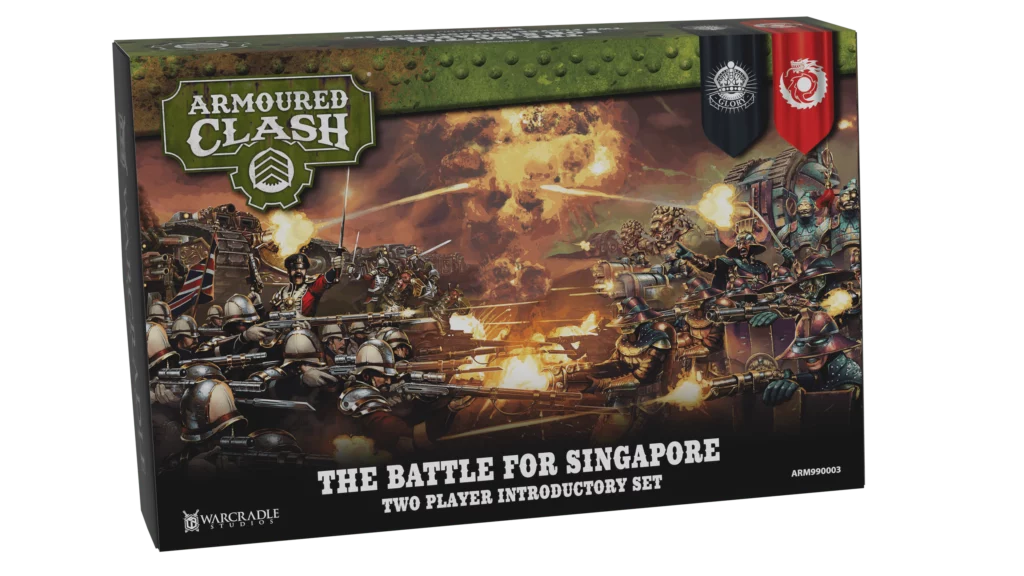
It also includes two introductory rule booklets (Quickstart Rules)… which I do not recommend. I find this rules summary frankly imprecise and occasionally misleading, which will force you to unlearn certain rules or logical interpretations of what is written. Instead, use the complete rulebook, available as a free PDF here, and read its roughly forty pages of rules. You can skip the aircraft rules, since none are included in this box.
If another faction catches your eye, each has its own introductory box (Introductory Set) and larger Battlegroup box (Battlegroup Starter Set). The only item included in the Introductory Set but not in its larger counterpart is a resin general miniature. This is entirely optional. If you do not want to invest too much before trying the game, the Introductory Set is a good choice for factions other than the Crown and Empire.
If you can afford the Battlegroup box, it contains more than twice as many miniatures as the Introductory Set. It includes everything you need to keep playing for quite some time.
A word of warning about the cards
One final word about the card decks: some have the faction logo on the back. They are otherwise exactly the same as the generic cards. Be aware that the Introductory Set does not contain the cards. If you are considering one of these boxes, I recommend buying a deck of cards as well.
Need advice or help?
I have yet to meet an Armoured Clash player who was not willing to help you or introduce you to the game! Here is where you can find them:
Written by:


Buy the team a round
No ads, no paywalls, just pure passion. If our guides or deep dives helped you win your last game or discover your next favorite system, consider dropping a small tip on Ko-fi! Every pint helps keep the site independent and running.