After the article about mortars and their usefulness in Bolt Action, I now invite you to explore another key element of the game: tanks. We will examine the tactics they enable, their strengths and weaknesses, and how to optimize their use to make them truly cost-effective on the battlefield.
Battle of Kursk near Orel, July 1943
July 1943, I was near Orel when it all began. As commander of a Tiger I tank, one of the finest armoured vehicles of the German army, I certainly wasn’t expecting what would unfold that day. There were four tanks in my armoured platoon. All brothers in arms, all ready for combat. A seasoned crew capable of making a full tank of fuel last for hours.
I was observing the countryside around Orel. Several spotter reports indicated a Soviet push north of our positions. We were expecting an assault of T-34s, scattered and disorganized, like the previous times. Crews of novices unable to coordinate, even if they were driving good-quality tanks.
It was around six in the morning. The land was still silent and the cold of the night, mixed with humidity, formed patches of fog. Several wooded areas, set ablaze by previous fighting, gave off the smell of burnt wood.
Suddenly, I recognized the distinctive sound of a T-34 engine. I scanned the area, but still couldn’t see it. At 1,500 meters, a hillside hid the northern view from us. Our Tiger Is were in defensive positions. The day before, we had taken the time to camouflage our vehicles behind stone walls and add some vegetation.
I informed my men inside the machine. Some were dozing off, but they were quickly on alert.
“T-34 approaching, guys! Get ready! Anti-tank round loaded! Bearing 345°, elevation 12°. Gunner, confirm?”
The Tiger’s engine roared to life, staying at idle. The driver shouted: “Engine running, sir! Ready for manoeuvre in two minutes, oil is heating up!”
I searched for a target but couldn’t see it. The T-34 seemed to vanish into the landscape. I sensed that we weren’t facing beginners this time, but veteran crews using the terrain to advance and take position.
The other tanks in my platoon had started their engines. I saw a few infantrymen wake up and grab their weapons. The German army was about to live through another long day in Russia!
Light, medium, heavy and super-heavy tanks
The great diversity of tanks truly emerged at the end of the First World War, with categories such as light, medium and heavy tanks, each with specific performance and battlefield roles. In Bolt Action, we even see the addition of the super-heavy tank category.
These classifications are directly tied to the tonnage of the tanks, which gives a clear indication of their armour, their intended battlefield role, their ability to withstand enemy fire, and of course the weapons they are equipped with.
Light tanks
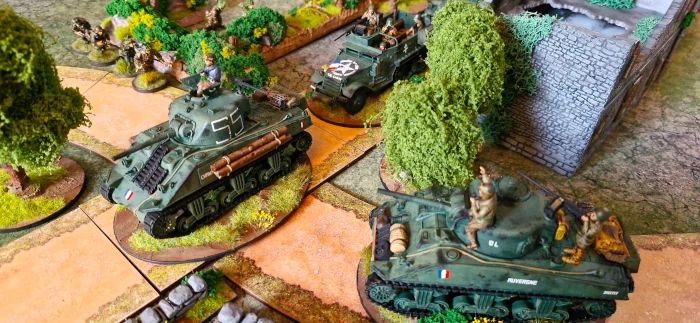
With an armour value of 8+, the light tank is immune—like all tanks in Bolt Action—to so-called small arms (weapons with no penetration). Generally, these vehicles carry only light anti-tank weapons and machine guns. Their main role is to eliminate infantry. They provide mobile support for advancing troops. They can destroy enemy transports thanks to their light anti-vehicle weapons, such as autocannons.
Their low points cost allows players to field several of them, whether regular or inexperienced. Very mobile and relatively small, they are ideal for armies built around manoeuvre. If you need fast fire support to help your troops advance, these tanks are a solid choice. They can also act as an escort for troop transports by “opening” the road ahead.
An army facing numerous enemy infantry units to neutralize might choose to field three light tanks equipped with autocannons. Relevant examples include the Panzer II & Panzer III (Early) for the Germans. On the Soviet side, the T-28 or the T-70 are also excellent tactical choices if you’re looking for efficient light tanks.
Medium tanks
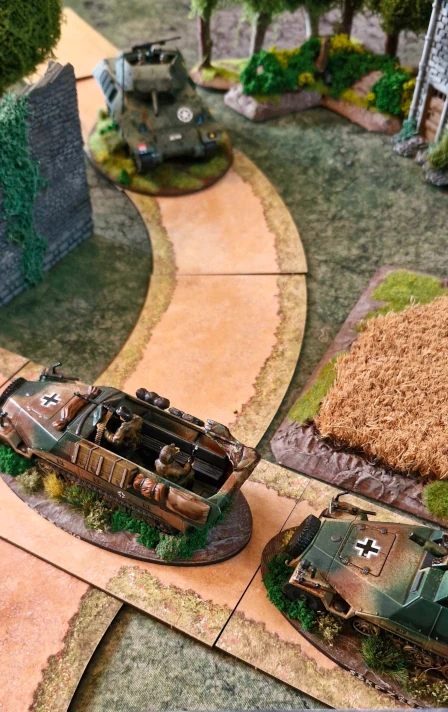
The medium tank strikes an excellent balance between solid armour and an affordable cost. Medium tanks offer a wider variety of gun types. They excel at infantry support thanks to howitzers with strong anti-personnel capabilities. As tank hunters equipped with a range of anti-tank guns, they become a real threat to enemy armour.
Every army offers medium tanks with various weapon options. These units can form the spearhead of your force, acting as a rolling battering ram that pins and destroys enemy units while providing your own troops with the fire support they need to advance safely.
However, medium tanks remain vulnerable to enemy tank hunters. The key is to avoid their direct firing lines. Prioritize mobility over accuracy to ensure you never become a stationary target.
Heavy and super-heavy tanks
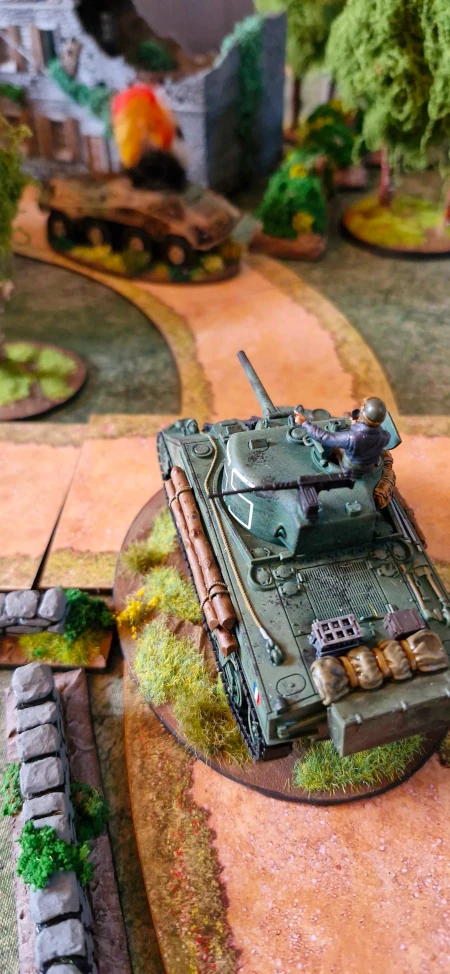
The heavy tank is a true behemoth, sporting 10+ armour and exceptional survivability. More imposing, its footprint on the battlefield is considerable. You may be tempted to overestimate its toughness, which often leads to a static “gun nest” strategy—leaving it immobile to destroy enemy armour as it appears.
In that setup, unless you are behind substantial and relevant cover, this strategy rarely pays off. Instead, prioritize movement. Use obstacles to break line of sight from enemy anti-tank weapons. Force them to reposition to fire on you, reducing their chances of hitting.
Heavy and super-heavy tanks attract an enormous amount of fire. Your opponent sees them as major threats to their own forces and will commit significant resources to destroy them. This strategy has its drawbacks.
Time on target: Coordinating fire
If you have two tanks, make an effort to use them together. Doubling fire on a single target—especially an enemy tank—greatly increases your chances of destroying it. The idea is to saturate the target to inflict as many pin markers as possible, potentially putting it out of action. To do this, it is crucial to practise coordinated manoeuvres, use blocking terrain, and activate both tanks simultaneously through your command vehicle. Coordination between two tanks is one of the keys to maximizing their potential. Both armoured vehicles must fill similar roles.
Tactical coordination between tanks and artillery
A tank is, by nature, mobile artillery. Ideally, artillery should support tanks at the front of the battlefield, much like a support squad covering an assault squad. The major difference is that artillery suffers from a major flaw: it is static. Once deployed, ensure that its lines of sight cover the areas where enemy tanks are likely to position themselves. Also anticipate lines of sight for turns 2, 3, and 4. This means choosing the “right” zones to cover during deployment. Artillery is often perceived as “less important”, and it is rare for it to be targeted as long as enemy tanks remain active. If the enemy has mortars and your artillery is visible to spotters, those guns will likely become priority targets.
Offensively, you can use your tanks and artillery in counter-battery fire against enemy artillery. This makes it a sensible secondary target during the opening turns.
Areas tanks should avoid
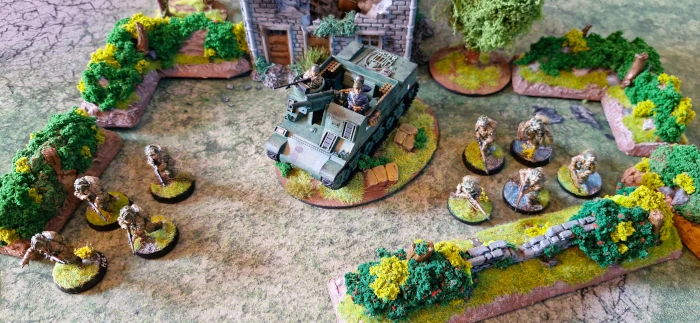
Imagine a dense urban environment: narrow streets, blind corners, buildings blocking sightlines, and alleys allowing enemy troops to advance unseen. In such a theatre, tanks should never enter without a dedicated infantry escort. This is especially true if the enemy has infantry-borne anti-tank weapons (anti-tank grenades, Panzerschreck, Bazooka, etc.).
In such situations, infantry squads are responsible for scouting and securing the flanks (front, sides, and rear) of a tank to prevent enemy squads from ambushing it. However, even if more vulnerable, a tank remains formidable fire support for infantry in urban combat.
If your battlefield includes a dense urban zone, avoid sending tanks in without sufficient infantry support. They will become trapped in a maze of streets that is difficult to secure. If the theatre lies at the edge of a town, with an “open plain” and a “dense urban” zone, keep the tanks outside. They can provide long-range fire support, destroy buildings, and help your troops advance safely through the urban area. Only move forward once the ruins are secured.
Another type of urban terrain to consider is a city with wide avenues. These long lines of sight are ideal for ambushes from buildings. The apparent safety of such avenues is deceptive, and they remain dangerous for armoured vehicles. Their chassis size becomes a problem, especially when advancing in a column. In this case, it is often wiser to place an artillery gun covering the avenue from afar. This “locks down” the axis much more safely for your troops.
Need advice building your army list?
Join your country’s Bolt Action Discord community and get answers to your questions.
The art of choosing the right tanks
Tanks often represent a significant investment in a Bolt Action list. While immune to small arms and generally very resilient, they are expensive, especially in a 1250-point list. In V3, the armoured platoon requires you to include two vehicles. The temptation to field two tanks is therefore strong—and even desirable if you want a list with substantial firepower.
Terrain plays a decisive role.
To choose the right tank type, it is essential to study the terrain, the mission objectives and, above all, the opposing forces. Heavy tanks and tank hunters excel when your opponent relies on their own armour to crush your infantry.
Is the battle taking place in a confined urban area? In that case, lighter wheeled vehicles may be more appropriate due to their speed and ability to exploit cover. A heavy, slow tank would be difficult to use effectively in such an environment. Conversely, a battle in open fields with many line-of-sight-blocking features makes the usefulness of tanks less straightforward.

Run tests with various types of tanks
It’s essential to run several tests to fully understand what a tank can or cannot do on the battlefield. Its relative invulnerability is only theoretical. In practice, you quickly realize that even a heavy tank can become vulnerable to simple squads equipped with anti-tank weapons—and end up costing you 250 or even 350 points because of a few lucky dice rolls and well-planned enemy positioning.
You should therefore see your tanks as support pieces rather than the centrepiece of your army whose destruction would inevitably lead to defeat. Even with a high points cost and thick armor, you will still need to maneuver carefully. Getting the most out of this equipment takes time and practice.
Choosing the crew: regular, inexperienced, or veteran?
Selecting the crew also requires careful thought. Should you pick inexperienced crews to reduce costs and potentially field three or four tanks in your list? Should you prioritize regular crews—more “reasonable” and better able to exploit the tank’s inherent capabilities? Or should you invest in veterans, even if it means sacrificing a squad or mortar elsewhere in your army?
In terms of firepower, fielding three or four tanks—even with inexperienced crews—lets you orient your list toward a mechanized company that is difficult to break. You can afford to lose one or two tanks while still benefiting from a very satisfying “steamroller effect.” As bullet magnets, four armored targets will draw most enemy fire, giving your infantry time to seize objectives and score victory points.
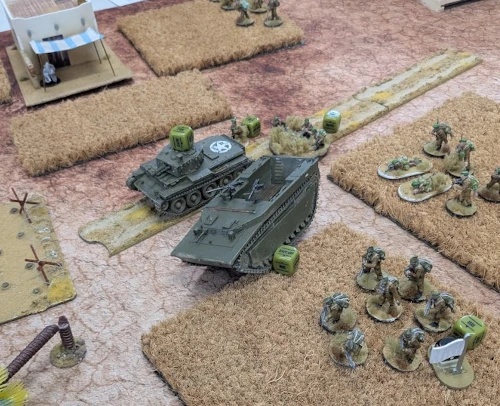
Conversely, choosing a single tank—potentially with a veteran crew—can be interesting for supporting your troops. You lose the steamroller aspect, but a well-chosen and well-handled heavy tank can intimidate your opponent. Acting as a spearhead for your troops, it can clear the way or absorb enemy fire, providing valuable breathing room for your infantry units.
Always think about a backup plan in case all your tanks are destroyed. Can you still achieve your mission? If the answer is “no,” you have probably invested too many points in your armored units.
Tip: the light command vehicle
For lists that include only one main tank, you may consider adding a light command vehicle. Its advantage is that it’s often wheeled, has the “recce” rule, and can quickly move across the battlefield to distribute orders when needed.
Mobile fire support, spearhead, or holding an objective?
A tank can take on all three of these essential roles.
Fire support
As fire support, the tank stays behind your troops, shelling enemy positions to support the assault. In this role, your goal is to break into a heavily defended zone while benefiting from lines of sight into enemy positions from your deployment area.
The idea is to stay far from enemy positions and make use of your long-range weapons. Support the assault by positioning along strong firing lanes and saturating the enemy. Your goal is to accumulate multiple PIN markers on their units, making them vulnerable and drastically reducing their defensive capability. Coordination with your troops happens at a slower, more measured pace compared to advancing infantry.
Spearhead
As a spearhead, your tanks will typically number at least three and will advance ahead of your troops. Their job is to break down the opponent’s defensive setup—destroying key points that enable enemy resistance and opening the path for slower infantry. They operate in close coordination, advancing side by side to destroy as many enemy squads as possible. In this role, tanks are highly dynamic and move toward the enemy each turn, even at the risk of exposing themselves.
The main risk is that your opponent fields one or more tank hunters. These vehicles are often more expensive than your “spearhead” tanks. Your advantage is in numbers: you can afford to lose one or two without compromising your overall strategy.
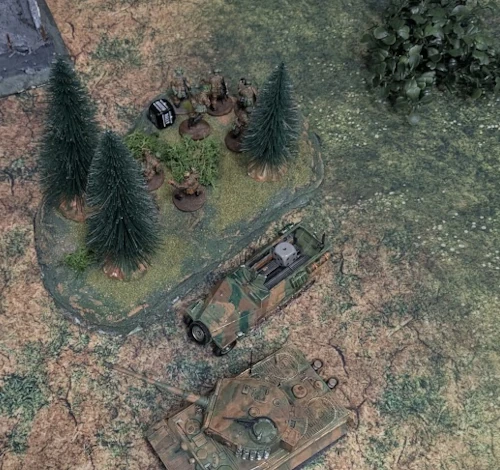
In a mechanized assault army, spearhead tanks also absorb enemy fire, allowing lighter vehicles to rush infantry toward attack zones.
During turn one, unless you have a miraculous line of sight on an important target, prioritize “Run” moves to seize the centre of the battlefield and set up good firing positions for turn two. Then let your troops catch up before pushing forward again. Adopt the rhythm: one turn of “Run,” one turn of “Fire,” and so on. This alternation maximizes your chances of hitting and dealing significant damage while preventing enemy mortars from ranging in on you.
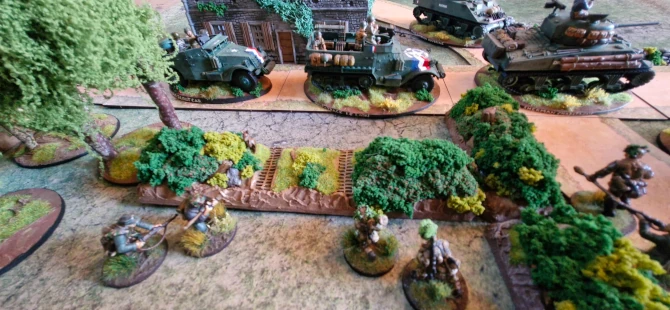
Holding objectives
By rule, a vehicle in Bolt Action cannot seize an objective. However, placing a tank near an objective forces your opponent to think twice before sending infantry to contest it. A tank’s machine guns and cannon can wipe out entire infantry squads.
However, this tactic cuts both ways: a stationary tank is a prime target and quickly becomes a fire magnet. It’s not always the best long-term way to use a tank’s potential on the battlefield.
Identify troops with anti-tank capabilities
Troops equipped with anti-tank options are a real threat to your tanks. Ideally, destroy them before they get into range. Bazookas (24” range) and Panzerschrecks (12” range) are among the most dangerous. Mobile and relatively fast, these teams will often pop up near your tanks—and usually at the worst possible moment, when your tank can no longer act and must endure their shots.
One solution is to coordinate the tanks’ advance with a squad tasked with protecting them. This requires strong coordination during movement.
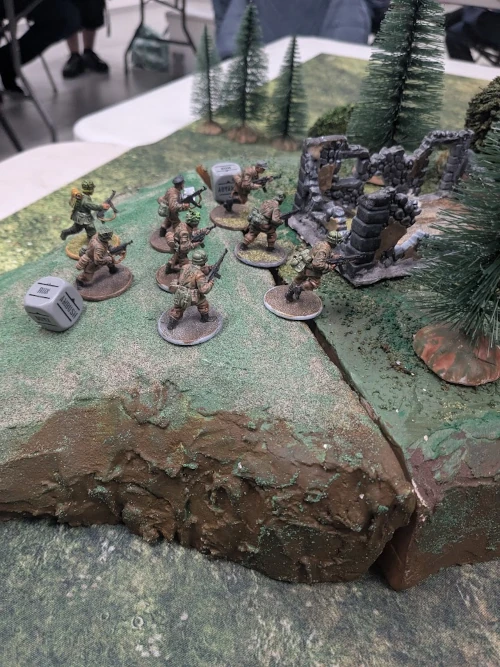
This is particularly viable in a fire support strategy, with infantry staying behind to clear the areas where your tanks will move.
In a spearhead approach, lighter vehicles can provide close anti-infantry defense. It’s clear that spearhead tanks remain more vulnerable to infantry-delivered anti-tank strategies.
Recommended armored vehicles
This chapter highlights a selection of interesting armored vehicles in terms of cost, rules, or armament.
Germany
This list is of course not exhaustive, and each player may adapt it according to personal playstyle. Beginners will find a good starting point for building an armored platoon.
The Germans are spoiled: they have access to a vast selection of armored vehicles, including some real competitive gems.
Panzer II Luchs
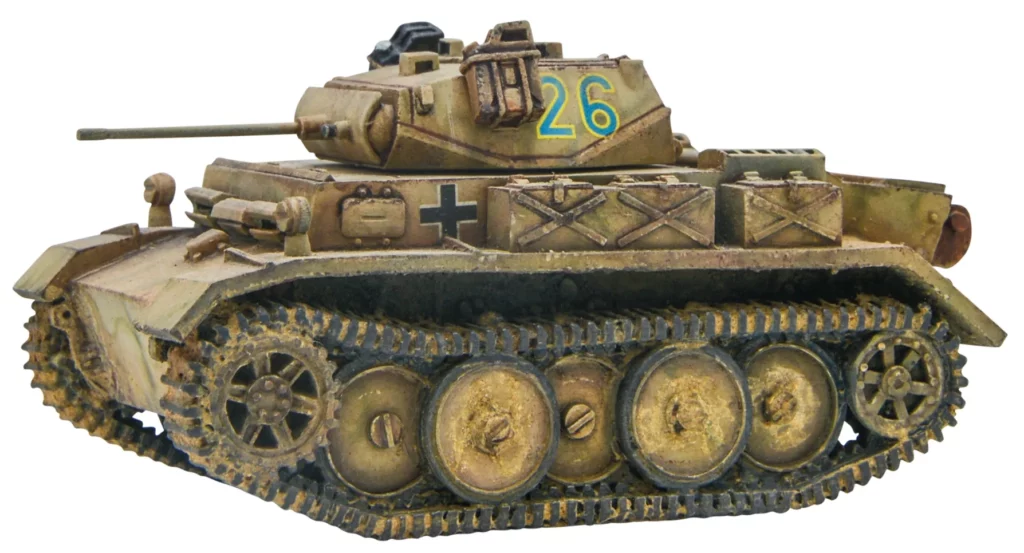
Its 20mm autocannon is perfect for saturating infantry and destroying light vehicles. Its low cost (125 points regular), combined with RECCE and 8+ armor, makes it one of the best light tanks in the game.
Sd.Kfz 234/2 Puma
Arguably the toughest and most versatile reconnaissance vehicle in the game. It has a medium AT gun and an MMG (benefiting from an extra shot) and even gets the Recce rule!
Panzer IV H
The best German medium tank in terms of cost-effectiveness: long gun (AT/HE) with PEN+6 and 9+ armor, making it an excellent tank hunter. It’s worth taking it as a veteran to access the PANZER ACE national rule. This gives you a 9+ tank hitting on 3+ when stationary, at penetration +7—capable of destroying enemy tanks on a 3+ on the damage table.
For example, against a 9+ armored vehicle from the front, you’re aiming for the following dice sequence: 3+ / 2+ / 3+ … deadly!
A reliable choice, useful in any scenario.
StuH 42
A howitzer variant of the StuG with a 105mm gun. A monstrous anti-infantry platform that excels against horde armies. It should be paired with an anti-tank piece for protection against enemy armor.
United states
The Americans excel in mobility and fire saturation.
M3 Stuart
Extremely mobile, with recce and multiple MMGs. One of the hardest vehicles for opponents to deal with—and always a high-priority target.
M4A3 Sherman 75mm
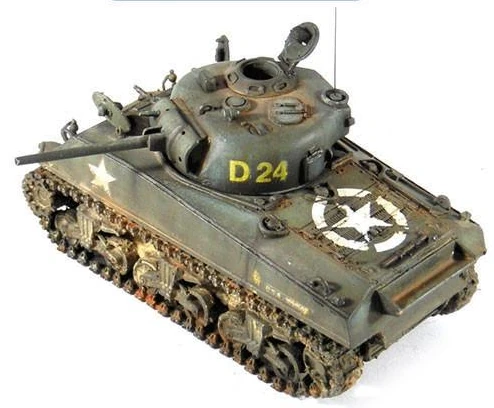
The American “Swiss army knife”: good at everything, master of none. Solid cost-to-firepower ratio. An efficient choice adaptable to all lists.
M18 Hellcat
An ultra-fast tank destroyer armed with a 76mm gun. Capable of taking out heavy armor—Panthers and Tigers included. It’s fragile, but its speed and firepower compensate for this and make it a major psychological threat. It also has the Recce rule, greatly increasing its tactical flexibility.
United kingdom
The British combine excellent reconnaissance with tough heavy armor.
Daimler Armoured Car
The best reconnaissance vehicle in the game: reliable, cost-effective, and equipped with a 2-pdr gun ideal against light armor.
Cromwell
Fast and versatile. Benefits from the UK rule (+1 HE). A strong alternative to the Sherman.
Churchill Mk VII
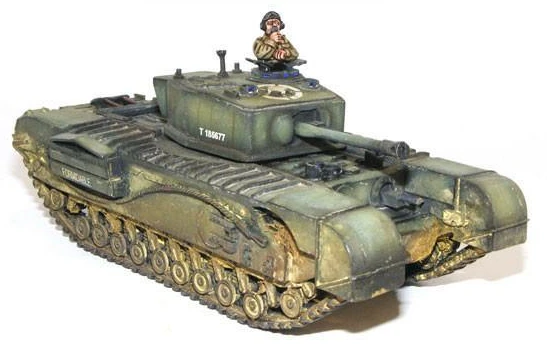
Monstrous armor (10+), nearly impossible to destroy without heavy guns. Its slow speed makes flanking difficult, but it remains an excellent option for holding an objective.
M3 Grant/Lee
Two guns—75mm and 37mm—allowing it to fire at multiple target types (AT/HE). Highly versatile. Beware, however: its tall profile and “vulnerable” rule make it fragile. Using cover is more challenging compared to a Sherman.
Japan
The Japanese have limited armored options but still access a few useful vehicles.
Type 97 Chi-Ha
A cheap medium tank. Effective against infantry and light vehicles. A good economical choice for Japanese armies. Can mount a flamethrower, adding psychological pressure.
Ho-Ni I
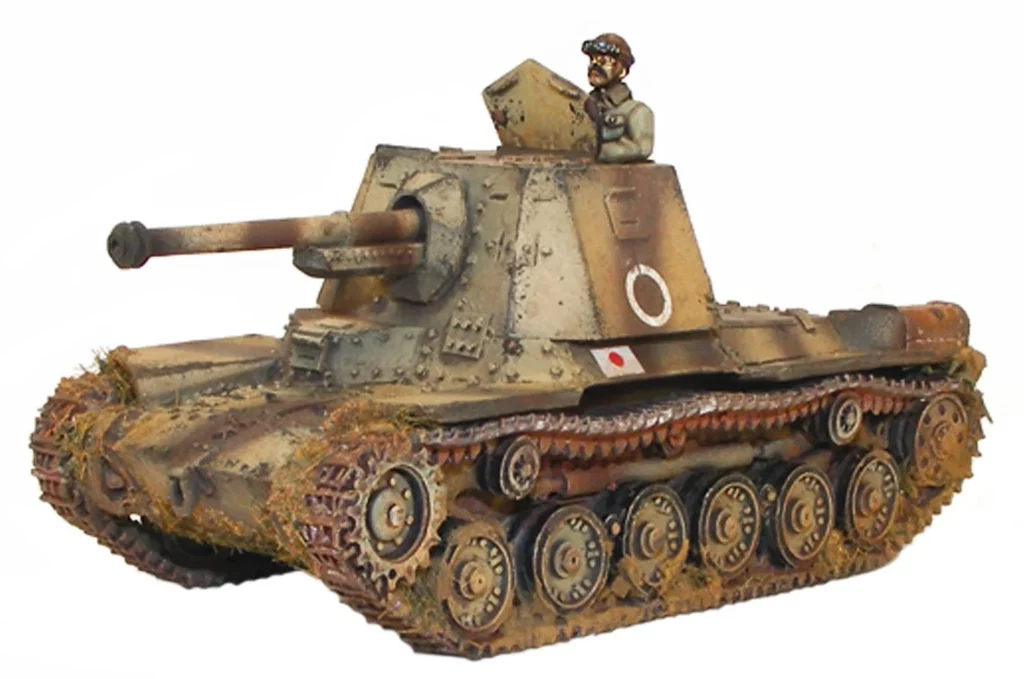
A support vehicle with a solid 75mm AT gun. Fills a crucial role by providing anti-tank capability to the Japanese.
Ha-Go (Type 95)
Extremely cheap. Fragile, but lets you field a scenario-appropriate tank without spending many points.
Conclusion
Tanks remain an excellent way to bring firepower onto the battlefield. Well used, they will be highly effective in combat. However, remember that you’re never safe from bad luck—a 6 to hit, then a 6 to penetrate with an anti-tank weapon, and suddenly your shiny tank is damaged or destroyed.
A tank is not always mandatory; some artillery-focused lists can operate without one and still withstand armored assaults for a long time. But if you’re seeking mobility and firepower, the tank is the solution.
Where to buy tanks for Bolt Action?
As part of our partnership with Maxi-rêves, the editorial team invites you to browse the products they have in stock or available on order to build the armored units for your various armies.

Support an independent wargaming website
Critical Hit is a volunteer-driven project, but it still comes with real costs. If the site helps you in your hobby, please consider supporting us on Ko-Fi. Every contribution, no matter how small, means a lot to us and genuinely helps us keep the project going.
Written by :
Take up the quill — write for Critical Hit
Put your favourite miniature game in the spotlight with an article on Critical Hit. Share your passion, spark excitement around it, and help grow its player base. 💪🏻
